 All Blog Posts
Statistics
Currently in L. Shelby'sWorldbuilding Database:
56 Stories (19 Finished)
461 Characters
1006 Events
654 Locations
214 Images

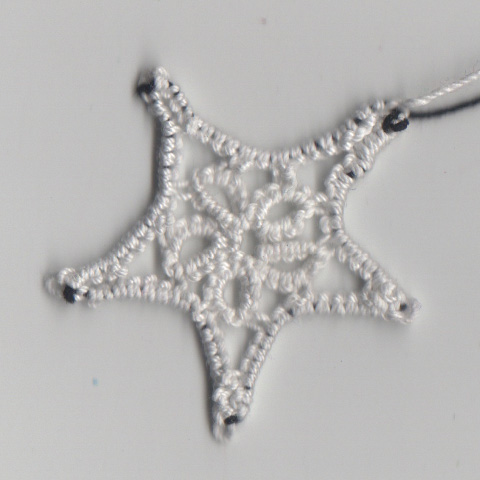
This small simple star is tricky only because the need to use lock stitches at the star points makes it important to keep the tension equal between all the points. It would normally be made with the same thread used on both shuttles, but in the pictured example, the core thread is a contrasting color. This allows you to see the lock stitches at each point of the star.
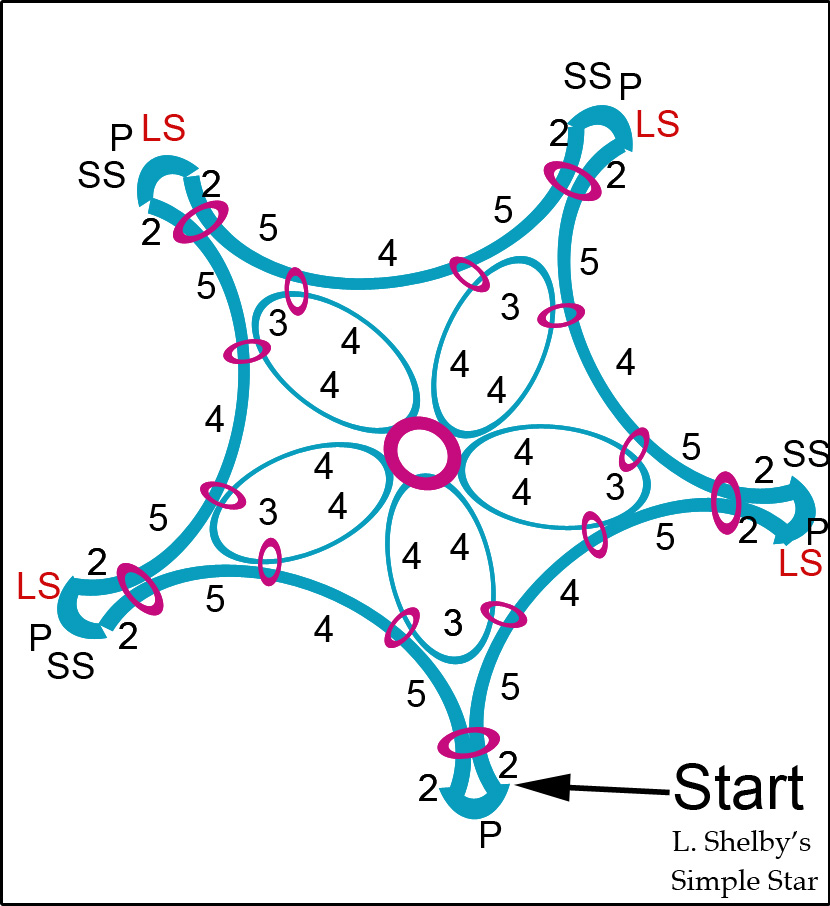
Start at a point of the star.
If you are going to use the starting and ending threads to make a loop to hang the star up with, or something, (I think it makes a cute mini-Christmas Tree Ornament) then you don't need to start with a picot. If you want it to be finished off with no dangling threads, you should start with a picot, so that all five points look the same.
The second picot you make on the first ring, (marked with a +) will be the center picot right in the middle of the diagram. Make it a little bigger than the other picots, but not too huge.
LS ( lock stitch). On the shuttle, this is a stitch that is not flipped, so that it doesn't slide down the core thread. You tighten the thread up before making the lock stitch, (which is only half a stitch.) Then I leave a P (picot) in the middle of the half done stitch, and the SS here stands for the second half of a doublestitch, to hold the picot in place.
The important thing is that the core thread should be tightened and fastened, and that there's a picot loop at the top of the point, and you're ready to start back down the other side.
(Or actually, you don't NEED a picot there for just the simple star, but it looks nice, and you will need the picots if you want to move on to the star medallion and then the 5 Star Bookmark)
You now should have a curved section going from point to point on the star, with two of the 5 center rings attached to it.
Once you have repeated 3 times, you should have five center rings, three completed star points, and two half points. Now you're ready to join up the last two points and complete the star.

